Align Your Pictures
With Tables
eobcards@eobcards.com
This is not the easiest way of laying out your pictures, but it's the best way. By using tables you have more control of where you can put your pictures.
This is a basic 3 column table with a picture in each column. By doing it this way it will force your computer to show all 3 pictures side by side.
Be careful with large pictures, if they don't fit on the screen, it will force the screen to scroll right & left.
If you only want to use two pictures, just don't use the middle line from and including
<td> to and including </td> Also unless you want pictures of my kids on your page,
you might want to change the URL to that of the picture you want to use.
<center><table>
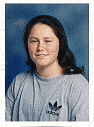
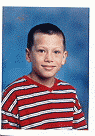
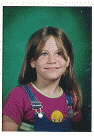
<tr><td><img src=http://www.eobcards.com/corey.gif></td>
<td><img src=http://www.eobcards.com/kelly.gif></td>
<td><img src=http://www.eobcards.com/robin.gif></td></tr>
</table></center>
If you want to put spaces between your pictures, you can do that by padding your cells with
cellpadding= or spacing your cells with cellspacing=
inside your <table> tag. For example:
<table cellspacing=8>.
I am going to do it below by making a table wider than the pictures, and aligning
the pictures within the cells.
Now lets lay out the table. First thing I did was to set the width of the table to
65% of the screen by adding width=65% to the <table>
tag. Next I added <br> five times before the last picture URL.
That forces 5 spaces above the last picture. Now you need to align the data in each cell.
In the <td> tag just before the first picture I added
align=center valign=top That will center the picture and place it at the top of the cell.
In the <td> tag before the second picture I added
align=center valign=middle This will align the picture vertically & horizintally in the center of the cell.
Next I added align=center valign=bottom to the <td>
tag just before the last picture. That will align the picture in the center at the bottom of the last cell.
<center><table width=65%>
<tr><td align=center valign=top><img src=http://www.eobcards.com/corey.gif></td>
<td align=center valign=middle><img src=http://www.eobcards.com/kelly.gif></td>
<td align=center valign=bottom>
    <br><br><br><br><br><img src=http://www.eobcards.com/robin.gif>
</td></tr></table></center>
Here's another example of how you can arrange your pictures using a table.
Only this time I am only using two columns. The column on the left has two pictures.
I used <br> to force the pictures on top of each other, then added it two more times to add spaces between the two pictures.
The cell on the right has one picture that is centered vertically & horizontally within the cell.
If you are using one large picture and two small pictures, you can put the large one in the cell on the right.
<center><table width=65%>
<tr><td align=center valign=top><img src=http://www.eobcards.com/corey.gif>
<br><br><br>
<img src=http://www.eobcards.com/robin.gif></td>
<td align=center valign=middle><img src=http://www.eobcards.com/kelly.gif></td>
</tr></table></center>
You can add a border to your table by adding border=2
or any other size you prefer. If you want to add backgrounds or background colors to your table
Click Here. For a page full of templates you can use
Click Here.
Tables For Beginners | Basic Tables | HTML Page | My Website | Spanning Columns & Rows
 |
O'Brien's Tree Services And Stumpgrinding
Serving all Tampa Bay FL Area counties.
Tree Trimming, Removals, Stumpgrinding
Call for a free estimate
Pinellas (727) 520-2582
Hillsborough (813) 270-3889
CLICK HERE for more information
|